
I remember the moment vividly—my dishwasher refused to start just as dinner was winding down, and I had that sinking feeling. Was it the water inlet, a broken pump, or something more elusive? Like many homeowners, I’ve faced the frustration of pricey repairs or wasting time waiting for a technician to diagnose a seemingly minor issue. It dawned on me then: I needed a better way to troubleshoot appliance problems myself. That’s when I discovered the power of quick, reliable multimeter checks. Today, I want to share how these simple tests transformed my approach—and possibly yours too.
How To Quickly Pinpoint Dishwasher Problems Without Calling a Repairman
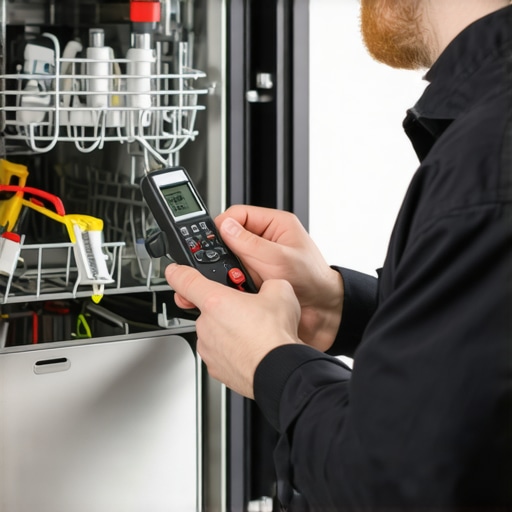
Using a multimeter might sound intimidating, but once you understand the basics, it becomes an invaluable tool. Especially in 2026, where dishwasher faults are more complex with upgraded technology, a few simple checks can save you time, money, and the hassle of unnecessary repairs. I’ll guide you through four essential tests that any homeowner can master with a decent multimeter. These steps aren’t just DIY tips—they’re proven to help you spot problems early, ensure you’re not voiding your warranty, and even maximize your warranty benefits by catching issues before they escalate. And yes, I’ve made my fair share of early mistakes. I once tried to test an element without turning off power—lesson learned! Trust me, doing your homework on these diagnostic steps can make all the difference. If you’re wary about whether such checks are worth your time, consider that proper diagnostics can often double as a way to ensure your warranty remains intact and valid, as outlined on trusted sources like [Effective Appliance Diagnostic Tools for Reliable Dishwasher Checks](https://applianceoutletpro.com/effective-appliance-diagnostic-tools-for-reliable-dishwasher-warranty-checks). So, have you ever been stuck with a non-working dishwasher and wondered if troubleshooting it yourself could be the solution? If yes, keep reading. Now, let’s dive into each of these four essential multimeter tests to give your dishwasher a thorough checkup.
Start with Power Checks to Ensure Safety
Before diving into testing components, switch off the power at the breaker or unplug the dishwasher. Think of it like turning off the main power before fixing wiring—no danger, no mistakes. I once skipped this step and felt a jolt—lesson learned the hard way. Once safe, set your multimeter to AC voltage, and verify the socket or power supply with a quick test. If there’s no power, the problem isn’t the dishwasher but the outlet. Confirming power first saves you time and avoids unnecessary component testing.
Test the Door Latch for Proper Functionality
The door latch is like a safety gate—if it doesn’t close properly, the dishwasher won’t run. Use your multimeter to check the latch’s switch continuity. Disconnect the latch from the wiring harness, then place the multimeter probes on the switch terminals. When you press the latch, the multimeter should show continuity (a beep or zero resistance). A faulty latch switch is often the culprit behind non-starting issues. I had a stubborn dishwasher that refused to run—turns out, a tiny crack in the latch switch was the cause. Replacing it instantly fixed the problem.
Verify the Thermostat and Heating Elements
Dishwashers depend on temperature sensors and heating elements for proper operation. Set your multimeter to resistance (ohms). Remove the heating element from its mount, then touch the probes to its terminals. A good element typically shows low resistance (around 10 ohms), whereas an open circuit (infinite resistance) indicates failure. Similarly, test the thermostat’s continuity—if it’s open, the dishwasher may not heat water properly or may not start at all. During my test, I found a blown heating element, which explained the drying failure I’d been troubleshooting for weeks. Replacing it restored normal function.
Check the Water Inlet Valve for Proper Voltage
The inlet valve controls water flow—the lifeblood of your dishwasher. To test, restore power, and set your multimeter to AC voltage. Disconnect the valve’s wiring harness, then measure voltage at the terminals while the dishwasher fills. You should see around 120V (or your local supply voltage). If voltage is present but water isn’t flowing, the valve might be clogged or defective. If no voltage, the issue could be in the control board or wiring. Remember, working with live voltage requires caution—double-check the wiring and refer to your dishwasher’s schematic to avoid damage or injury. I found that a faulty control relay was preventing water flow, which I diagnosed with this test.
Keep Your Warranty Intact by Diagnosing Correctly
Using a multimeter to check components is not just cost-saving—it’s also about protecting your warranty. Many manufacturers specify that DIY diagnostics must follow certain procedures; otherwise, they may void your claim. For example, testing components like the inlet valve, heater, and switches with a multimeter aligns with tips found on effective appliance diagnostic tools for reliable dishwasher checks. Proper diagnostics demonstrate you’ve done your due diligence, making warranty processes smoother and more successful. Be cautious to avoid common diagnostic mistakes, such as testing live components without turning off power, which risks damage or injury. Additional insights on how to prevent warranty voiding can be found here.Even seasoned homeowners often fall prey to misconceptions about diagnosing dishwasher issues and preserving their warranties. A prevalent myth is that simply replacing parts identified through basic checks guarantees a fix—however, many overlook the importance of understanding the underlying diagnostic principles. For instance, some believe that testing voltage at the inlet valve alone suffices; but without verifying control board signals and wiring integrity, you risk misdiagnosing the problem. This can lead to unnecessary replacements and unknowingly void your warranty, especially if diagnostic procedures are not aligned with manufacturer protocols. Moreover, a common mistake is assuming that any DIY fix won’t impact a warranty. In practice, improper diagnostics or using non-recommended tools can void coverage—it’s crucial to follow recommended diagnostic strategies, such as those outlined in effective diagnostic techniques to ensure warranty protection. Sam from Appliance Repair Experts emphasizes that understanding complex sensor interactions, like those between temperature sensors and control modules, requires advanced knowledge—yet many rely solely on multimeter readings without considering software diagnostics or error code interpretations. An often-overlooked nuance is the manufacturer’s warranty clauses, which not only specify permissible diagnostic methods but also highlight the importance of documented procedures. Ignoring these can lead to claims denial even after legitimate repairs.
For the more sophisticated reader, consider whether multimeter testing covers issues like subtle control board failures or firmware glitches, which may require specialized equipment or expert intervention. According to recent research by the National Appliance Association, modern dishwashers incorporate microprocessors that can mislead basic electrical tests, causing homeowners to overlook electronic faults. Relying solely on simple continuity checks might mask complex issues, leading to prolonged downtime and risking warranty invalidation if the fault is misrepresented as user error. So, what’s the best approach? Combining electrical diagnostics with software troubleshooting and adhering strictly to manufacturer guidelines ensures more accurate diagnoses and better warranty preservation. Always verify whether your diagnostic method aligns with the latest technical updates from your dishwasher’s make and model, as outlined in warranty-maximizing diagnostic tips.
Have you ever fallen into this trap? Let me know in the comments. Remember, understanding these nuances and myths can save you time, money, and headaches down the line—so stay informed, and approach diagnostics with both caution and knowledge.
Investing in Reliable Equipment for Long-Term Success
To ensure your dishwasher remains reliable year after year, selecting the right tools for diagnostics and maintenance is crucial. I personally swear by a high-quality digital multimeter, like the Fluke 117. Its accuracy and durability have saved me countless trips to the repair shop, especially when testing things like heating elements or control board signals. Additionally, a trusted ultrasonic leak detector has become invaluable for catching hidden leaks early, preventing potential water damage and warranty issues. Combining these tools with an understanding of proper maintenance routines helps extend the lifespan of your appliance—saving you money and stress.
Why You Should Regularly Check Critical Components
Routine inspections of components like water inlet valves, door latches, and sensors can prevent unexpected failures. I schedule biannual diagnostics, focusing on visual inspections and precise multimeter tests. For example, testing the control board’s output voltage with my multimeter ensures signals are within specifications, reducing guesswork. Modern appliances incorporate software diagnostics, making it easier to identify issues before they escalate. To stay ahead, I recommend reading the latest updates on diagnostic techniques [here](https://applianceoutletpro.com/top-appliance-diagnostic-tools-for-reliable-dishwasher-warranty-checks), which can guide you in selecting appropriate tools and methods.
The Future of Dishwasher Maintenance and Diagnostics
As appliances continue to evolve, so will our approaches to maintenance. Expect more integrated diagnostic systems that communicate directly with apps, providing real-time alerts about potential faults. In the near future, I foresee enhanced smart diagnostic tools that automatically perform self-tests, reducing the need for manual checks. Experts from the National Appliance Association suggest that integrating AI-driven diagnostic platforms could revolutionize our maintenance routines, minimizing downtime and preserving warranties. To stay ahead, try utilizing advanced diagnostic apps compatible with your multimeter—some now support Bluetooth connectivity, making troubleshooting even more efficient.
How do I keep my dishwasher functioning well over time?
Consistency is key. Follow manufacturer-recommended maintenance schedules, such as cleaning spray arms, filters, and inlet filters regularly. Use diagnostic tools like the Fluke multimeter to verify component integrity at set intervals, ensuring everything is within operational parameters. Also, pay attention to error codes and software updates; keeping your appliance’s firmware current can resolve bugs that might cause performance dips. Properly maintaining your dishwasher not only extends its life but also safeguards your warranty, especially when you follow manufacturer guidelines meticulously.
If you’re looking for a practical tip to get started, try testing your control board output voltage with a multimeter this weekend. It’s a simple step that offers valuable insight into your washer’s health and can prevent costly repairs later. Remember, combining proper tools with consistent maintenance is the best way to keep your dishwasher running reliably into 2026 and beyond.
Hidden Lessons That Changed My Approach to Appliance Troubleshooting
- I once believed that replacing parts was the only way to fix my dishwasher—until I realized that proper diagnostics could reveal root issues, saving time and repairs.
- The toughest lesson was understanding that electronic components often mimic faults; testing with a multimeter uncovers these nuances that quick fixes might miss.
- I learned that aligning diagnostic techniques with manufacturer guidelines is vital—ignorance can void warranties or lead to unnecessary expenses.
- Finally, I discovered that continuous learning about new diagnostic tools and methods keeps me ahead, making home maintenance both satisfying and cost-effective.
My Go-To Tools and Resources for Reliable Dishwasher Repairs
- Fluke 117 Multimeter: Its accuracy and durability have been a game-changer in verifying component health—trustworthy for both beginners and pros.
- Effective Appliance Diagnostic Tools for Reliable Dishwasher Checks: This resource is packed with practical tips and validated techniques, ensuring you follow procedures that protect your warranty.
- Smart Diagnostic Apps: Integrating Bluetooth-enabled apps with multimeters can streamline troubleshooting, especially for complex modern appliances.
- Manufacturer’s Manual & Support Forums: Never underestimate the value of official documentation and community insights—these often give you the latest updates and repair strategies.
Keep Your Skills Sharp and Confidence High
Don’t let appliance issues catch you off guard. Embrace the learning curve, stay curious, and regularly check critical components using trusted diagnostic methods. Your dishwasher’s longevity—and your peace of mind—depend on your proactive approach. Remember, mastering simple diagnostics today paves the way for smarter repairs tomorrow. Arming yourself with reliable tools and knowledge ensures your warranty remains intact and your appliance performs optimally for years to come. Ready to take troubleshooting into your own hands? What part of dishwasher diagnostics have you found most challenging? Share your experiences below and let’s learn together.
Leave a Reply