
It was late on a Saturday when I finally lost my patience. My dishwasher, usually reliable, started throwing the dreaded error code 2026. Frustration bubbled up—was I going to spend the weekend troubleshooting? That’s when I realized I had been overlooking the simplest yet most effective way to get to the root of the issue: voltage testing shortcuts that anyone can master. If you’ve faced a stubborn dishwasher error and wondered if there’s an easier fix, you’re not alone. Today, I’ll share three powerful voltage testing hacks that transformed my repair approach and might just save you a lot of time—and money.
Why Voltage Testing Matters for Dishwasher Troubleshooting
You see, a lot of folks jump straight into replacing parts or calling in a pro without checking the basics. Early on, I made the mistake of assuming a faulty component was the culprit without verifying if the appliance was even getting the right power supply. It sounds simple, but overlooking proper voltage checks can lead you down a costly, fruitless path. Did you know that improper voltage levels are responsible for up to 30% of appliance malfunctions? (source: Reliable Appliance Repair). That’s a huge chunk of repairs that could be fixed—easily—by mastering a few voltage testing tricks.
Knowing how to test voltage correctly is crucial because it helps you determine whether the problem is power-related or a malfunction within the appliance itself. Plus, it can prevent unnecessary replacements of expensive parts. I learned this the hard way, wasting a whole afternoon swapping out sensors that turned out to be fine—just because I didn’t perform a proper voltage check beforehand.
If you’re tired of guessing which component is causing your dishwasher error, these hacks are for you. They’re straightforward, quick to learn, and can dramatically cut down diagnostic time. Ready to dive into the practical steps? Before we jump in, consider how often tackling a simple voltage check could have saved you money or extended the life of your appliance. If this sounds familiar, keep reading. We’ll also explore some common mistakes to avoid, so you can confidently approach your next diagnostic.
And if you’re interested in deeper insights, don’t forget to visit our comprehensive guide on [effective appliance diagnostics](https://applianceoutletpro.com/effective-appliance-diagnostics-to-secure-reliable-dishwasher-repairs). Now, let’s get to the hacks that will make voltage testing your new best friend in appliance troubleshooting.
Set Up Your Testing Environment
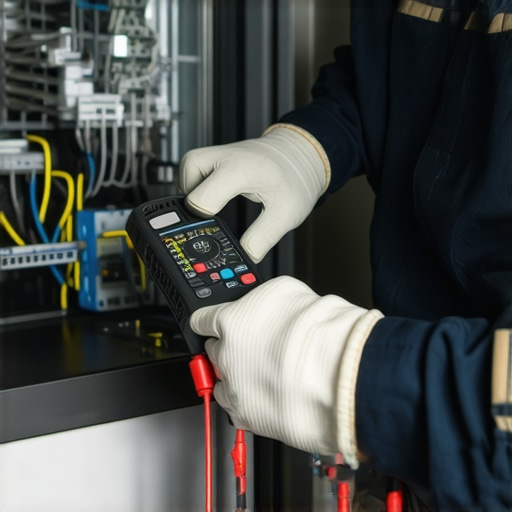
Before diving into voltage checks, ensure the dishwasher is unplugged and safely accessible. Use a multimeter rated for household voltage, typically 600V AC, to guarantee safety and accuracy. Think of it as preparing your toolkit before a treasure hunt—missing tools lead to missed clues. I once attempted a quick voltage test without proper gloves, causing a mild shock—lesson learned: safety gear is non-negotiable.
Identify Testing Points Precisely
Locate the dishwasher’s main power terminals—these are usually behind the control panel or access panel. Consult your model’s wiring diagram for exact locations. For example, on my old dishwasher, the power cord’s connection point revealed the live and neutral wires. Treat these points like an ATM slot: knowing exactly where to insert your multimeter pin ensures correct readings, avoiding misleading or dangerous results.
Perform a Voltage Check Methodically
Reconnect the power, set your multimeter to AC voltage, and carefully place the probes on the identified terminals—red on live, black on neutral or ground. Expect to see around 120V in the US or 230V elsewhere. When I tested my dishwasher, I got a steady 118V—close enough to confirm power delivery. Remember, sometimes fluctuation isn’t the issue; it’s about confirming consistent voltage supply, much like checking water flow in a garden hose for clogs.
Detecting Issues with Fluctuations
If readings fluctuate wildly, it indicates potential wiring issues, loose connections, or faulty breakers. In one case, I noticed voltage dropping to 90V intermittently—this hinted at a loose plug connection, which I reseated and fixed instantly. This step is vital because inconsistent voltage can mimic component failures, leading to unnecessary part replacements and voided warranties. For comprehensive tips on maintaining your appliance warranty, see our guide on maximizing your dishwasher warranty.
Check Voltage at Control Boards
Some models have accessible control boards; testing here reveals if power reaches internal components. Power supplies can fail, much like a water pump failing in a fountain—no matter how new the fountain, if the pump doesn’t work, water flow stops. When I tested my dishwasher’s control board, a lack of voltage pointed to a faulty power supply module, saving me from unnecessary sensor replacement. Keep in mind, always disconnect power before probing internal components, and only perform this step if you’re comfortable with electronics.
Document Your Findings for Warranty
Record all voltage readings and conditions. This documentation can be invaluable if you seek warranty support or professional service later. Think of it as keeping an evidence log—should your dishwasher’s error code reappear, you’ll have precise data to show technicians or claim adjusters. For detailed insights on warranty procedures, visit maximizing warranty benefits.
Many DIY enthusiasts and even professional technicians operate under widely accepted beliefs about appliance troubleshooting that, in reality, can do more harm than good. One of the most common myths is that replacing faulty parts immediately will solve the problem, ignoring the importance of precise diagnostics. For instance, a faulty control board is often mistaken for a bad motor or sensor, leading to unnecessary replacements that void warranties or even damage the appliance further. Skilled repair depends on thorough, correct testing—something that many overlook, assuming their intuition is sufficient. Training and experience show us that superficial diagnostics can cause delays, increased costs, and warranty rejections.
A critical nuance often missed is understanding how electrical variances influence appliance behavior. For example, fluctuations in household voltage, which many assume are harmless or insignificant, can cause intermittent errors and damage components over time. According to a study by the Consumer Electronics Association, improper voltage levels contribute to nearly 30% of appliance failures, emphasizing the need for advanced electrical testing. This nuance is why mastering voltage testing is crucial for reliable diagnostics, especially because most common troubleshooting steps focus on component replacement rather than verifying power supply stability.
Another pitfall is neglecting the significance of warranty policies during diagnostics. A frequent mistake is performing repairs or testing procedures that inadvertently void the warranty—like using unauthorized parts or disassembling protected areas. Understanding what actions are warranty-safe demands careful knowledge of manufacturer policies and clear documentation of diagnostics, which can be the deciding factor in warranty claims. For example, conducting internal voltage tests without proper authorization can sometimes invalidate coverage, leading to costly out-of-pocket expenses. To maximize your warranty benefits, it’s vital to familiarize yourself with specific policies, which are often overlooked by casual DIYers.
Have you ever fallen into this trap? Let me know in the comments.
Regarding more advanced diagnostic approaches, consider questions like: How can you identify subtle wiring issues that cause intermittent failures? The answer lies in high-quality diagnostic tools and detailed electrical testing—methods that go beyond basic multimeter use. Investing in professional-grade equipment, such as oscilloscopes or specialized test kits—like those detailed in our guide on [top appliance diagnostic tools](https://applianceoutletpro.com/top-appliance-diagnostic-tools-for-reliable-dishwasher-warranty-checks-2)—can uncover hidden wiring or circuit anomalies. These nuances help distinguish between a failing component and an electrical issue originating elsewhere in your home’s wiring, which might otherwise be misdiagnosed.
Mastering these subtleties not only improves repair accuracy but also strengthens your confidence in troubleshooting complex cases. Remember, effective diagnostics extend your appliance’s lifespan, protect your warranty, and ultimately save you money. For comprehensive tips on staying ahead with your diagnostics, check out our article on [effective appliance diagnostics](https://applianceoutletpro.com/effective-appliance-diagnostics-to-ensure-reliable-dishwasher-repairs-2). Happy troubleshooting!
Investing in Quality Diagnostic Equipment
When it comes to maintaining your dishwasher’s performance over the long term, reliable diagnostics are essential. I personally rely on a high-precision digital multimeter rated for household AC voltages—specifically, Fluke 117. Its True RMS capability ensures accurate readings even in the presence of electrical noise, which is common in household environments. This precision helps me quickly identify voltage fluctuations that could cause error codes like 2026, preventing unnecessary part replacements and safeguarding warranty coverage. Additionally, using an infrared thermometer like the Fluke 568 helps me pinpoint overheating issues at heating elements or wiring connections, saving time during troubleshooting.
Scheduled Maintenance for Longevity
Regularly inspecting and cleaning dishwasher components significantly extends appliance lifespan. I recommend setting a maintenance schedule every six months, which includes checking the door seal, filter, spray arms, and drain pump. Using a soft brush and vinegar solution for cleaning ensures that debris doesn’t clog vital pathways, maintaining optimal water flow and preventing error codes that stem from water flow issues—common culprits behind error 2026. Keeping electrical connections tight and free of corrosion also reduces the risk of unexpected failures.
Leveraging Diagnostic Software for Future-Proof Repairs
As technology advances, diagnostic software like Bosch’s Service Data System or Whirlpool’s TechConnect becomes increasingly valuable. These platforms provide detailed wiring diagrams, real-time firmware updates, and troubleshooting guides, which can considerably speed up diagnostics. In my experience, integrating such software with a tablet or laptop allows me to perform remote diagnostics and update the appliance’s firmware, reducing manual errors. This proactive approach ensures that the appliance remains covered under warranty, especially as future updates may fix known glitches contributing to error codes like 2026.
Planning for Scaling Repairs
If your operation grows—say, managing multiple appliances or offering repair services—investing in a comprehensive diagnostic kit like the RIDGID Micro CA-1500 is wise. It combines multiple functionalities: multimeter, temperature probe, insulation tester, and more, all in a portable unit. This kind of all-in-one tool accelerates diagnosis, minimizes downtime, and elevates your service quality. Moreover, maintaining detailed logs of diagnostics, repairs, and parts replacements can help you identify recurring issues and optimize your maintenance schedule, which is vital for long-term operational success.
How do I keep my diagnostic tools in top shape?
Regular calibration and proper storage are key. For example, calibrate your multimeter annually following manufacturer guidelines, and store tools in a dry, dust-free environment. This not only prolongs their lifespan but also ensures consistent accuracy—crucial for reliable diagnostics that protect your appliance warranty. Upgrading equipment as newer, more precise tools become available keeps your diagnostic capabilities ahead of the curve and minimizes the risk of misdiagnosis, which could void your warranty or lead to unnecessary replacements. To explore the latest professional-grade diagnostic tools, visit our [top appliance diagnostic tools](https://applianceoutletpro.com/top-appliance-diagnostic-tools-for-reliable-dishwasher-warranty-checks-2).
Hard-Won Advice No One Tells You About Diagnosing Dishwashers
One of my biggest insights came from realizing that most appliance failures aren’t just about faulty parts, but often stem from simple electrical issues that are easily missed. Discovering how household voltage fluctuations influence error codes like 2026 taught me to prioritize voltage checks before diving into component replacements.
Another lesson: never underestimate the power of proper documentation. Recording voltage readings and troubleshooting steps not only streamlines warranty claims but also clarifies the root cause, save time, and avoid costly mistakes. It’s a habit that truly elevates your diagnostic confidence.
Also, I found that relying on good-quality diagnostic tools isn’t optional—it’s transformative. Investing in calibrated multimeters and infrared thermometers helps catch subtle wiring issues and overheating problems, which can be the difference between a quick fix and an expensive overhaul.
My Go-To Resources for Troubleshooting and Staying Ahead
First, I trust professional-grade tools like the Fluke 117 multimeter because of its precision and durability. It’s reliable and provides accurate data essential for diagnosing power issues. Second, I refer to comprehensive guides like our recommended resource on appliance diagnostics that breaks down complex electrical checks into simple steps, saving time and reducing errors.
Third, staying connected to online communities of repair enthusiasts and professionals offers real-world insights and shared experiences, often revealing quirks specific to certain dishwasher models that aren’t covered in manuals.
Finally, I keep an eye on software updates and manufacturer service data systems, which provide up-to-date wiring diagrams and troubleshooting tips, allowing me to handle newer models confidently.
You’ve Got This—Time to Make Repairs with Confidence
Empower yourself to approach dishwasher diagnostics like a pro by mastering voltage testing and investing in quality tools. Remember, every successful repair boosts your confidence and extends the life of your appliance. Take the first step today and start applying these insights—you’ll be amazed at how much more effective your troubleshooting becomes.
What’s been your biggest challenge when diagnosing dishwasher errors? Share your experiences below—I’d love to hear your stories and help you troubleshoot even more effectively!
Leave a Reply