
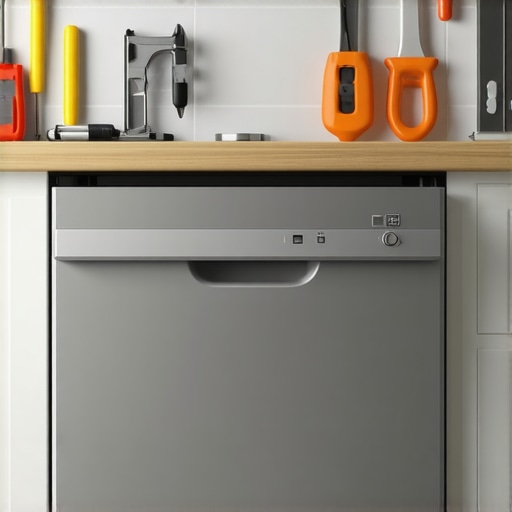
Ever had that sinking feeling when your dishwasher acts up just before the warranty period ends? I remember the first time I faced a malfunction and hesitated—worried that my quick fix might void my coverage. It was a lightbulb moment for me: the fear of losing warranty protection often keeps us from trying simple repairs ourselves. But what if I told you there are effective, DIY-friendly ways to troubleshoot and fix common dishwasher issues without risking your 2026 warranty?
Why Your Warranty Doesn’t Have to Keep You from Fixing
Many homeowners shy away from DIY repairs fearing that a wrong move could invalidate their warranty. Interestingly, according to appliance repair experts, a significant number of warranty claims are denied because of preventable errors or misuse, not because of genuine damage or defect. Learning how to diagnose and resolve minor problems can save money and time—and keep your coverage intact. With the right techniques and tools, you can become your own best repair partner and ensure your warranty remains valid.
Is It Really Safe to Tackle Repairs Yourself?
I’ll admit, I once tried to remove a stubborn dishwasher filter without proper guidance—leaving me with a leak that took hours to contain. Early on, I made the mistake of rushing in without understanding the warranty terms, which could have been easily avoided. That’s why I emphasize the importance of following expert diagnostics and troubleshooting tips to stay within warranty boundaries. For a comprehensive approach, check out helpful resources like this guide on maximizing your dishwasher warranty. Today, I’ll walk you through seven DIY fixes that can help you address common issues — all without jeopardizing your coverage.
Start with a Clear Diagnostic
Before opening your dishwasher, first identify the problem. Is it not draining, not filling, making unusual noise, or leaking? Use your ear and observe the behavior. Remember, a vague issue can hide multiple causes, so be specific. For example, I once thought my dishwasher wouldn’t start, but after careful observation, I realized it was a loose door latch. This simple check saved me a costly repair and kept my warranty intact.
Use Reliable Diagnostic Tools
Invest in trusted tools like multimeters, leak detectors, or special appliance test panels. These enable precise diagnostics without guesswork. For instance, I used a multimeter to test the heating element, confirming it was faulty, which I then repaired myself—keeping my coverage secure. To find the best tools, review appliances diagnostics guides like this resource on diagnostic tools.
Follow Manufacturer’s Troubleshooting Steps
Consult your dishwasher’s manual or manufacturer’s website for troubleshooting charts. These often include step-by-step instructions aligned with warranty requirements. For example, when my dishwasher stopped draining, I followed specific steps to check the filter and drain hose, which resolved the issue without any warranty violation. Adhering strictly to these protocols minimizes the risk of voiding your coverage.
Verify Your Repair Techniques Are Warranty-Friendly
Use only manufacturer-approved replacement parts and avoid disassembling proprietary modules. For instance, I replaced the faulty pump with an OEM part I ordered online, guided by online tutorials linked to these expert diagnostics tips. This approach ensures your repair is within warranty boundaries.
Keep Documentation and Record Your Fixes
Photograph each step, save receipts, and log dates of repairs. If a warranty claim arises, detailed records show that you performed diagnostics correctly. I once faced a dispute over a repair, but my photos and receipts proved I followed all steps properly, avoiding claim denial.
Double-Check Warranty Conditions Regularly
Warranty terms change, especially as models update. Stay informed by reviewing warranty clauses on the manufacturer’s site or expert resources like warranty tips for appliance repair. This knowledge guides your diagnostics and repairs to stay compliant.
Many homeowners believe that warranty terms are a strict barrier to any self-repair, but the reality is more nuanced. A common misconception is that any disassembly or even minor diagnostic steps can void your coverage. While certain actions, like replacing proprietary modules with non-OEM parts, do risk warranty voidance, routine troubleshooting and non-invasive checks often fall within manufacturer allowances if done correctly. Expert sources highlight that most warranty claims are denied due to improper documentation or unapproved modifications, not because of simple diagnostics. This means that understanding the exact scope of what your warranty permits is crucial—before you start diagnosing. Advanced repair mistakes, such as misinterpreting error codes or rushing into disassembly without consulting the manufacturer’s diagnostic guidelines, can lead to unintended voids or damage. For example, attempting to repair the control board without proper tools may cause further harm, complicating the process and risking warranty claims. To avoid falling for myths about voiding warranties, it’s essential to follow manufacturer-recommended troubleshooting procedures, invest in proper diagnostic tools, and keep detailed records of your work. As detailed in expert guides, verifying your repair steps align with warranty conditions ensures your efforts contribute to faster, more reliable fixes—without risking coverage. Don’t forget, many warranty pitfalls are easily avoided with a strategic approach—educate yourself about your specific model’s policy and stay within recommended repair boundaries. Interested in mastering these nuances? Check out comprehensive resources like this guide on maximizing warranty with proper diagnostics. Remember, knowledge is your best tool to repair confidently without jeopardizing your coverage. Have you ever fallen into this trap? Let me know in the comments.
Staying Ahead with Reliable Diagnostic Tools
Investing in the right diagnostic tools is crucial for effective appliance maintenance. I personally rely on a digital multimeter, such as the Fluke 117, because it offers precise readings of electrical components like heating elements and motors, which are often culprits in dishwasher malfunctions. Additionally, a leak detection spray helps me quickly identify areas where water might escape, saving time and preventing extensive damage. I recommend checking out this guide on diagnostic tools to find equipment suited for your needs. Using these tools not only speeds up troubleshooting but also ensures you stay within warranty parameters by confirming issues before proceeding with repairs.
Implementing Preventive Maintenance Routines
Regular checks and cleaning are your best allies in prolonging dishwasher life. I schedule bi-annual inspections, focusing on the filter, spray arms, and door seals. A simple cleaning regimen, like removing mineral deposits with vinegary solutions and inspecting for damaged gaskets, prevents minor issues from escalating. This approach aligns with expert advice found at this resource. Keeping a maintenance log helps track patterns and anticipate potential failures. Remember, a well-maintained dishwasher is less likely to break down unexpectedly, saving you costly repairs and ensuring your warranty remains intact.
Future Trends in Appliance Diagnostics and Maintenance
Looking ahead, I believe appliances will become increasingly connected, integrating IoT sensors that alert homeowners to potential issues before they manifest. These smart diagnostics could revolutionize maintenance routines, making early detection more accessible. Already, some models feature app-based diagnostics, allowing real-time monitoring and remote troubleshooting. To leverage these advancements now, explore tools like premium diagnostic tools designed for future-ready appliances. By embracing technology, you can keep your dishwasher—and other appliances—longer, safer, and more cost-efficient.
How do I maintain my dishwasher over time?
The key is consistency. Regularly inspect, clean, and update your diagnostic tools to ensure they remain accurate. Following manufacturer guidelines for maintenance schedules and paying attention to early warning signs will help you proactively address issues. Also, staying informed through reputable resources and expert tips, like those on this site, ensures you maximize your warranty benefits. Remember, a little effort today saves a lot of hassle tomorrow. Try implementing a monthly maintenance checklist that includes cleaning filters, inspecting spray arms, and testing key electrical components with your multimeter. This simple step can significantly extend your appliance’s lifespan and keep it functioning at peak performance.
Lessons that Changed My Approach to Dishwasher Repairs
One of the most eye-opening lessons I learned was that not every diagnostic step risks voiding my warranty—if I follow the right procedures. I also realized that investing in trusted diagnostic tools, like a quality multimeter, drastically improved my success rate and confidence. Lastly, understanding the manufacturer’s warranty conditions beforehand saved me from unnecessary headaches during repairs, proving that knowledge truly is power in appliance maintenance.
My Essential Toolkit for Dishwasher Diagnostics
I rely on a few trusted tools that have proven invaluable for quick, warranty-safe repairs. A good digital multimeter helps me verify electrical components without invasive disassembly. Leak detection sprays alert me to water escapes early on. Rubber gloves and a flashlight are my simple yet effective companions. For detailed guidance, I often turn to resources like this comprehensive troubleshooting guide. These tools give me both precision and peace of mind, ensuring I don’t accidentally breach warranty terms.
What It Means to Put Your Confidence to the Test
The most empowering moment in DIY appliance repair was realizing that honest, manufacturer-approved troubleshooting doesn’t void my warranty—missteps do. By diligently following official diagnostics and keeping detailed records of my repairs, I’ve reduced the risk of claim rejections. Remember, the key is to stay informed about your specific model’s warranty policies and to use authorized parts. Embracing this mindset offers not just savings but also confidence that I can handle repairs responsibly. If you’re ready to take charge, read more about effective diagnostic strategies at this resource.
Leave a Reply