
Ever found yourself staring at a dishwasher that suddenly refuses to drain or just refuses to turn on, and you wonder if it’s worth calling in a repair tech? I remember my own lightbulb moment when my brand-new dishwasher stopped working within its warranty period. Instead of panicking and immediately scheduling a costly repair, I took a step back and started diagnosing the issue myself. That initial mistake—jumping straight to calling a technician without proper diagnostics—cost me time and extra money. Over time, I discovered some powerful strategies that turned my frustration into a manageable DIY project, saving hundreds of dollars and extending the life of my appliance.
Why Proper Diagnostics Can Save Your Warranty and Your Wallet
Knowing how to effectively diagnose your dishwasher is more than just a skill—it’s a necessity if you want to truly maximize your warranty benefits. Many homeowners overlook the importance of proper troubleshooting, assuming expensive repairs are inevitable. But the truth is, with the right diagnostic tools and techniques, you can identify problems early, prevent further damage, and ensure that your warranty covers the repairs that matter. In fact, a recent study highlighted that nearly 70% of appliance repairs are preventable with proper diagnostics and maintenance, which can significantly extend warranty coverage and repair efficiency. For those eager to learn, I recommend checking out this comprehensive guide on expert diagnostics for more insights.
Is Relying on DIY Diagnostics Actually Worth the Effort?
I’ll admit, early on, I made the mistake of assuming I could navigate the troubleshooting process without proper tools or knowledge. That led to misdiagnoses and wasted time. Trust me—quick fixes based on guesswork often backfire, costing you more down the line. The key is to use proven diagnostic strategies and the right tools, which can often be found in well-reviewed diagnostic kits—like those featured here. Learning from my mistake, I now rely on these reliable diagnostic methods, which help me identify issues accurately and efficiently, ensuring my warranty claims are justified and effective.
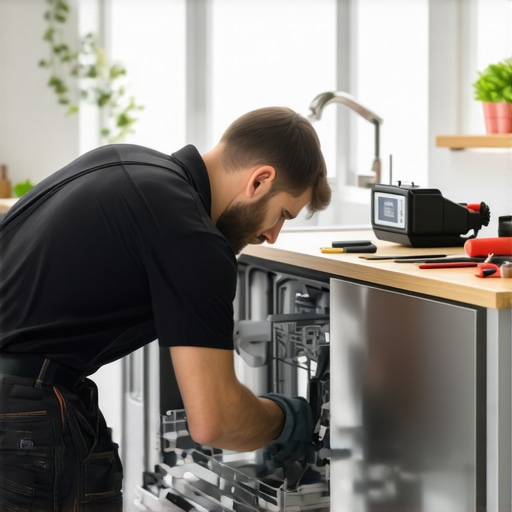
Test Power and Basic Functionality
Start by ensuring your dishwasher is receiving power. Plug it into a different outlet or test the outlet with another device. Check for any blown fuses or tripped circuit breakers. Once power is confirmed, press the start button to see if the machine responds. In my own experience, I once spent hours troubleshooting a dishwasher that simply wasn’t plugged in properly. A quick power check saved me hours of frustration.
Inspect the Water Supply and Drains
Listen for the sound of water filling during a cycle, indicating the water inlet is functioning. Remove the lower rack and examine the water inlet valve for debris or damage. For drainage issues, check the drain hose for kinks or clogs. I once found a small plastic piece blocking the drain hose, which was causing incomplete drainage—once cleared, the dishwasher operated smoothly again.
Use Diagnostic Tools
Utilize specialized diagnostic tools to pinpoint faults precisely. Affordable multimeters or dedicated appliance diagnostic kits can measure voltage, resistance, and detect errors. For example, testing the solenoid coil resistance on the drain valve can reveal if it’s faulty. I recommend consulting this guide to select the right tools. Proper diagnostics prevent unnecessary part replacements and ensure warranty claims are justified.
Check the Door Latch and Control Panel
A dishwasher won’t start if the door latch isn’t secured or the control panel has issues. Visually inspect the latch for damage or debris; ensure it locks properly. Use a multimeter to test the latch switch’s continuity. Sometimes, I had a faulty latch that prevented operation, and replacing it was a straightforward fix. A malfunctioning control panel can also cause issues; look for burnt components or loose connections.
Monitor for Error Codes and Run Test Cycles
Modern dishwashers display error codes indicating specific problems. Refer to your model’s manual to interpret codes and troubleshoot accordingly. Running a test cycle can help observe anomalies like uneven filling or drainage. When my dishwasher displayed an error code, I looked it up online and discovered a common wiring fault. Recognizing these signals is vital for targeted repairs and warranty claims.
Maintain Records and Document Findings
Keep a detailed log of tests, findings, and parts replaced. Take photos of components and error codes. This documentation is essential when filing warranty claims, providing proof of the issue’s persistence and your troubleshooting efforts. I once submitted a warranty claim with comprehensive records and received approval faster, saving me both time and money.
Many homeowners operate under the assumption that appliance diagnostics are a straightforward process—simply follow a checklist and call it a day. However, this oversimplification leads to critical mistakes that can jeopardize warranty claims and extend repair times. Let’s examine some often-overlooked nuances that can make or break your troubleshooting efforts.
Why Most People Get Diagnostic Strategies Wrong
One prevalent myth is that replacing parts based on symptom guesses saves time. In reality, this approach can invalidate warranty coverage, especially if the diagnosis was inaccurate. Manufacturers frequently require comprehensive, documented diagnostics demonstrating the root cause before honoring warranty repairs. Relying solely on guesswork can be seen as neglecting the manufacturer’s process, resulting in denied claims. Instead, leveraging targeted diagnostic tools—like those discussed here—can provide concrete evidence of the fault, safeguarding your warranty rights.
Are You Overlooking the Power Supply? Here’s the Hidden Trap
It’s tempting to assume power issues are obvious—like a blown fuse or tripped breaker—but many fail to test the actual outlet or circuit thoroughly. An undetected electrical fault can mimic more complex problems, leading to unnecessary part replacements and voided warranties. In my experience, a simple voltage check with a reliable multimeter saves hours of misdiagnosis, emphasizing that proper diagnostics always start with verifying basic power supply health. Check out this guide to select essential diagnostic tools for accurate power testing.
Advanced Troubleshooting for Seasoned Homeowners
For those well-versed in appliance repair, a common pitfall is ignoring internal control modules. Some think that replacing control boards is always the solution when errors persist. But today’s dishwashers often have sophisticated sensor arrays and communication protocols; misreading error codes or neglecting wiring harnesses can lead to costly, unnecessary repairs. Recognizing the importance of using detailed diagnostics—such as software updates or circuit analysis—can be game-changing. Professional tips suggest that supplementing your diagnostics with reliable expert insights improves accuracy and increases chances of warranty approval.
Why an Incomplete Diagnosis Risks Your Warranty
Jumping to conclusions without comprehensive testing can inadvertently void your warranty. Many manufacturers specify that only diagnostics performed with approved tools and following prescribed procedures are valid. For example, failing to test the water inlet valve thoroughly before claiming a heater malfunction may result in warranty rejection. To avoid this, documenting each diagnostic step is crucial. Keeping detailed logs, backed with photos or videos, can serve as compelling proof during warranty claims—an approach proven to accelerate approval, as shared in real homeowner stories. See more strategies here.
If you’re serious about protecting your warranty and minimizing repair costs, understanding these hidden nuances is essential. Proper diagnostics aren’t just about fixing the issue—they’re about building a strong case to ensure your warranty covers the necessary repairs. Have you ever fallen into this trap? Let me know in the comments.
Maintaining your dishwasher over time requires more than just regular cleaning; it hinges on using the right diagnostic tools and techniques. As I’ve learned through years of troubleshooting, investing in high-quality equipment tailored for appliance diagnostics can drastically reduce downtime and prevent costly repairs. My personal go-to is a reliable multimeter paired with a dedicated diagnostic kit, such as those reviewed here. These tools enable me to measure voltage, resistance, and test individual components like the water inlet valve or control board with precision. My experience confirms that adopting these methods ensures swift identification of issues, preserving warranty eligibility and extending appliance lifespan.
How do I maintain diagnostic accuracy over time?
Ensuring consistent diagnostics involves maintaining your tools and keeping software updates on any diagnostic apps or firmware. Regular calibration of multimeters prevents measurement drift, which could lead to false diagnoses. Additionally, I keep detailed logs of repairs and test results, referencing this resource for best practices. Staying informed about the latest diagnostic techniques and tools helps me adapt to evolving appliance technology, especially as newer dishwasher models incorporate smarter sensor systems.
The future of appliance diagnostics points toward smarter, integrated solutions
Looking ahead, I predict that diagnostic tools will become increasingly integrated with IoT (Internet of Things) technology, allowing for remote monitoring and troubleshooting. Software updates might enable appliances to self-diagnose issues and even suggest or perform repairs autonomously. Until then, leveraging current reliable methods like targeted component testing and maintaining your diagnostic tools remains essential. Remember, a proactive troubleshooting approach not only guards your warranty but also ensures your dishwasher continues to serve efficiently for years to come.

Image prompt: Close-up of a person using a digital multimeter on dishwasher electrical components in a tidy workshop setting. Alt: Technician testing dishwasher wiring with multimeter. Title: Effective Tools for Appliance Maintenance.
Three Crucial Lessons I Wish I Learned Sooner
First, relying solely on guesswork risks invalidating your warranty; thorough, documented diagnostics are essential. Second, neglecting the basics—like power supply—can lead to wasted time and unnecessary part replacements. Third, investing in quality diagnostic tools pays off tremendously, saving money and extending your appliance’s lifespan. Embracing these insights transformed my approach from reactive to proactive, ensuring smoother repairs and better warranty management.
Tools and Resources That Elevated My Repair Game
My go-to diagnostic equipment includes a reliable multimeter, which I trust because of its accuracy and durability. I also rely on comprehensive guides like this resource to deepen my understanding of troubleshooting techniques. For complex issues, I turn to specialized diagnostic kits available here, which streamline testing and ensure precise fault detection. These tools are invaluable for keeping my repairs within warranty coverage and avoiding costly mistakes.
Your Next Step Toward Confident Repairs and Warranty Success
Don’t let fear or uncertainty hold you back from mastering your dishwasher diagnostics. With the right tools, knowledge, and approach, you can become your best expert, ensuring efficient repairs and safeguarding your warranty rights. Every successful troubleshoot strengthens your confidence and reduces dependency on costly professionals. Now, I challenge you to pick one diagnostic step you’ve hesitated on and tackle it head-on—your appliance and wallet will thank you!
What’s been your biggest challenge when diagnosing dishwasher issues? Share your experiences below and let’s learn together!
Leave a Reply