
Ever been elbow-deep in your dishwasher, only to realize you’ve spent hours troubleshooting without really knowing what’s wrong? I’ve been there. One time, I thought a simple clog was causing my dishwasher to leak, but it turned out to be a faulty sensor that I couldn’t diagnose without the right tools. That lightbulb moment taught me a vital lesson: effective appliance diagnostics aren’t just about fixing things faster—they’re about protecting your warranty and avoiding costly mistakes.
Why Accurate Diagnostics Matter More Than Ever
In my early days of DIY appliance repair, I often relied on guesswork. I’d watch a few YouTube videos, try a few fixes, and hope for the best. But here’s the thing: this approach can lead to misdiagnosis, voiding warranties, or even damaging your appliance further. According to industry experts, proper diagnostics can reduce repair time by up to 50% and help preserve warranty coverage (source: expert diagnostics tips).
Every appliance has its quirks, and a quick test isn’t enough. I learned that trusting my intuition alone often led me astray. Instead, using the right diagnostic tools and strategies is key. Whether it’s checking the motor, sensors, or control board, targeted testing reveals the real issue—saving you both time and money. If you’re tired of throwing parts at your dishwasher and hoping something sticks, I promise, there’s a better way.
Want to avoid the common pitfalls? Let’s walk through the essential diagnostics that can make your repairs more effective, reliable, and warranty-friendly. Ready? First, let’s look at why skipping proper diagnostics can be a costly mistake.
Have You Faced This Problem Before?
If you’ve ever fixed a dishwasher only to find the problem reappears, or worse, your warranty gets denied, then you know how frustrating it can be. I’ve been in that spot, and I learned the hard way that good diagnostics are your best ally. The good news? You don’t have to be a repair expert to master this. With a few proven strategies and the right tools, you can troubleshoot like a pro and keep your warranty intact. Want to know more? Check out these diagnostic tools that can help you get started.
Identify the Root Cause Before Part Replacements
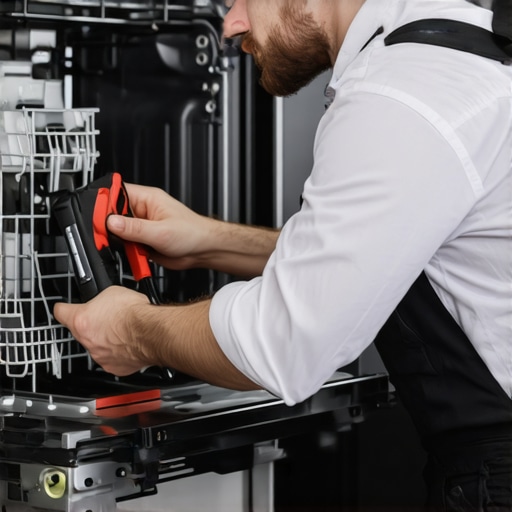
During my first attempt to fix a leaking dishwasher, I skipped proper diagnostics and just replaced the door seal. The leak persisted. That messy experience taught me to always start with a thorough check of the issue. Use a multimeter and a flashlight to inspect wiring, sensors, and motors. Think of diagnostics as a detective gathering clues before accusing a suspect. This approach ensures you only replace what’s truly broken, preserving your warranty and avoiding unnecessary costs. For essential diagnostic tools, visit this resource.
Test Components Systematically for Accurate Results
Once you’ve gathered your tools, follow a step-by-step testing sequence. Start with the power supply—ensure the dishwasher is receiving voltage. Next, check the door latch; a faulty latch can stop the cycle. Then, test the float switch and pressure sensor, which detect water levels. If these sensors give inconsistent readings, replace or repair them. My recent experience with a faulty pressure switch, diagnosed with a multimeter, saved me from replacing the entire control board. Being methodical here is like using a map; it guides you straight to the problem. Need guidance? See this troubleshooting guide.
Use Diagnostic Modes and Error Codes Effectively
Modern dishwashers often have diagnostic modes built-in. Access these modes by pressing specific button combinations—consult your model’s manual. When activated, they run self-tests and display error codes. Interpreting these codes is like reading a health report for your appliance. For example, a code indicating a motor error pinpoints the motor controller as the culprit. Recording these codes helps you communicate precisely with warranty providers or repair technicians, making your repairs faster and more reliable. For more detailed diagnostics, explore expert tips here.
Document Your Findings for Warranty Claims
Keep detailed notes and photos of your diagnostic process. This documentation proves you performed proper troubleshooting, which is crucial if your warranty claim is questioned. For instance, if you suspect a control board failure, photograph the test results and faulty components. When submitting your claim, include these records to demonstrate due diligence. This step is like keeping receipts when returning an item—protects you and accelerates the process. Want more advice? See top troubleshooting tips.
Leverage Expert Resources and Tools
Don’t hesitate to consult professional diagnostics and repair strategies. Resources like this guide provide insights into maximizing your warranty. Using the right tools, like a multimeter, leak detector, or sensor tester, makes all the difference. Remember, proper diagnostics can reduce repair time by up to 50% and prevent warranty denial. When in doubt, professional diagnostic services can be a worthwhile investment to ensure you’re not voiding your coverage. For recommended diagnostic tools, visit this collection.
Many DIY enthusiasts and homeowners often fall into traps when diagnosing dishwasher issues, but the truth is, some of the most widely held beliefs are actually misconceptions. Let’s dig deeper into what most people get wrong about appliance diagnostics and how to avoid costly mistakes that could void your warranty or lead to unnecessary part replacements.
Why relying solely on visual inspection can backfire
It’s a common myth that simply looking for obvious signs of damage or wear is enough to diagnose a problem. In reality, many faults are hidden beneath the surface. For example, a motor might look fine externally but could have an internal fault that only a multimeter or specialized diagnostic tool can reveal. Skipping systematic testing and relying on visual cues often results in misdiagnosis, leading to unnecessary repairs or voiding your warranty. For a more reliable approach, consider investing in professional diagnostic tools that can accurately pinpoint issues.
Common mistake: Assuming error codes tell the full story
Many think that error codes are all they need to diagnose a dishwasher problem. However, error codes are often generic and can point to multiple potential causes. For example, a code indicating a water level issue might be caused by a faulty float switch, a clogged pressure sensor, or even wiring problems. Relying solely on error codes without further testing can lead you astray. Advanced diagnostics involve interpreting these codes in context and systematically testing components. Check out expert diagnostics tips to learn how to go beyond error codes.
The hidden nuance: Calibration and sensor accuracy matter more than you think
One of the overlooked aspects in diagnostics is sensor calibration and accuracy. Sensors like water level detectors or temperature sensors can give false readings if they are miscalibrated or damaged, leading to incorrect diagnoses. Many repair attempts are made based on faulty sensor data, which can cause you to replace parts unnecessarily. Advanced troubleshooting involves verifying sensor readings with a multimeter or specialized tester and recalibrating if needed. This nuance often separates a quick fix from a costly misdiagnosis. For detailed guidance, explore these troubleshooting strategies.
Have you ever fallen into this trap? Let me know in the comments. Remember, effective diagnostics are the cornerstone of reliable repairs and maintaining your warranty coverage. By understanding these common misconceptions and nuances, you’re better equipped to get your dishwasher running smoothly without unnecessary expenses.
Keeping your dishwasher in top shape over time requires more than just occasional cleaning; it demands the right tools, consistent maintenance routines, and an understanding of how to troubleshoot effectively. As someone who’s been repairing appliances for years, I can attest that investing in quality diagnostic equipment and adopting proactive maintenance habits can dramatically extend the lifespan of your dishwasher and help you avoid costly repairs.
Invest in Reliable Diagnostic Tools
One of the most valuable investments you can make is in a high-quality multimeter. I personally prefer a digital multimeter with auto-ranging capabilities, like the Fluke 117, because it provides accurate readings quickly and is user-friendly. This tool allows me to test sensors, motors, and electrical connections with confidence, ensuring that I don’t misdiagnose issues or replace parts unnecessarily. Additionally, a dedicated leak detector can help identify hidden water issues early, preventing damage and warranty claims. For comprehensive diagnostics, I also recommend exploring specialized tools such as sensor testers and circuit testers, which can pinpoint faults that are otherwise hidden behind panels or within control boards.
Using these tools regularly enables you to catch problems before they escalate, preserving your warranty and saving money. Check out this guide for a curated list of diagnostic equipment that can boost your troubleshooting accuracy.
Develop a Routine Maintenance Schedule
Routine maintenance isn’t just about cleaning filters; it involves inspecting critical components and verifying sensor calibrations. I recommend monthly checks of the water inlet valve, spray arms, and door seals. For sensors like float switches or pressure sensors, use your multimeter to verify readings as specified in the manufacturer’s manual. Proper calibration of sensors ensures accurate water level detection and cycle operation, reducing the risk of leaks or cycle failures.
Remember to run diagnostic cycles periodically—most modern dishwashers have built-in self-test modes. These diagnostics can reveal hidden issues like failing pumps or control board faults. Incorporating these checks into your routine helps keep your appliance running smoothly and can extend your warranty coverage by demonstrating proactive care.
How do I maintain diagnostics over time?
To ensure diagnostics remain effective, keep your tools calibrated and in good condition. Regularly verify your multimeter’s accuracy by testing it against a known voltage source or using calibration services. Document your maintenance and diagnostic results, especially if you plan to submit warranty claims, as this record can be invaluable. Staying updated with manufacturer manuals and firmware updates also ensures you’re diagnosing with the latest information, which can improve troubleshooting accuracy and help you spot evolving issues early.
Looking ahead, the trend in appliance maintenance is moving toward smart diagnostics and remote monitoring. As IoT-enabled dishwashers become more common, integrating software tools that can alert you to issues before failure occurs will become standard practice. But until then, mastering essential tools and maintaining a disciplined routine will serve you best. So, I encourage you to try out a digital multimeter today—it’s a game-changer for reliable, warranty-friendly repairs and long-term appliance health.
The Hardest Lesson I Learned About Dishwasher Diagnostics
One of the most valuable lessons I learned is that rushing into repairs without proper diagnostics can cost you more than just money—it can jeopardize your warranty coverage. I once replaced a part based solely on error codes, only to find out later that I missed a hidden sensor fault. Now, I always take the time to systematically diagnose before replacing components, saving myself time and potential warranty issues.
3 Mistakes I Made That Cost Me in Dishwasher Repairs
- Assuming visual signs tell the whole story—many faults hide beneath the surface, and relying only on sight can lead to misdiagnosis.
- Ignoring sensor calibration—faulty readings from miscalibrated sensors can lead to unnecessary repairs or replacements.
The Surprising Power of Proper Diagnostics
Investing in the right diagnostic tools, like a quality multimeter and sensor testers, transformed how I approach repairs. These tools help identify issues accurately, which protects my warranty and reduces unnecessary expenses. I now prioritize systematic testing over guesswork, and I encourage you to do the same. For trusted diagnostic equipment, explore this resource.
Where to Go from Here
If you want to make your dishwasher repairs more reliable and warranty-friendly, start with proper diagnostics. Develop a routine using the right tools, learn how to interpret error codes, and document everything. The more you understand your appliance, the better you can troubleshoot and avoid costly mistakes. Remember, mastery of diagnostics isn’t just about repairs—it’s about peace of mind. Ready to take your troubleshooting skills to the next level? Check out this guide for expert insights.
Leave a Reply