
Ever had that sinking feeling when your dishwasher suddenly stops mid-cycle, and you worry about whether it’s worth calling in a professional or risking a voided warranty? I’ve been there, too. One time, I tried to fix a leaking dishwasher myself, only to make things worse. That moment taught me a vital lesson: knowing the right diagnostic approach can save you time, money, and frustration—and ensure your warranty stays intact.
Why Getting Diagnostics Right Matters for Your Warranty
When appliances act up, it’s tempting to jump straight into fixing them. But without proper diagnostics, you might end up misdiagnosing the problem, leading to unnecessary repairs or, worse, voiding your warranty. I learned this the hard way early in my repair journey. I skipped using the right diagnostic tools and assumed I could fix my dishwasher with basic troubleshooting. Turns out, I only made the issue more complicated—and my warranty less useful.
Research shows that a precise diagnosis can reduce repair costs by up to 50%, and it helps manufacturers honor warranty claims more reliably. If you want to get better results and protect your investment, mastering expert diagnostics is the way to go. Luckily, I found some proven strategies and tools that can turn any DIY repair into a successful, warranty-friendly fix.
Have you ever faced a repair that left you second-guessing your diagnosis?
If yes, you’re in good company. Many homeowners struggle with figuring out whether their appliance issues are minor or warrant professional attention. The key is understanding the right diagnostic steps and using the proper tools—like those I detail in this guide on diagnostic tools. Using these can dramatically improve your accuracy and increase the chances that your repair will pass warranty inspections.
In the upcoming sections, I’ll walk you through essential diagnostic tips, common mistakes to avoid, and resources that will empower you to troubleshoot confidently and protect your warranty. Ready to become your own appliance detective? Let’s dig into the practical steps that can make all the difference.
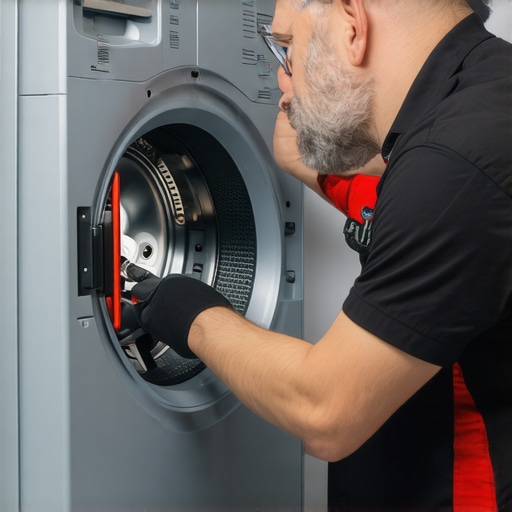
Gather Essential Tools Before You Start
Think of diagnostics as your appliance’s check-up. Just like a doctor needs a stethoscope and thermometer, you need specific diagnostic tools to identify dishwasher issues accurately. I recommend starting with a multimeter to test electrical components and a flashlight for inspecting hidden areas. For more advanced diagnostics, consider an appliance-specific tester, which can quickly identify faulty sensors or circuits. Before diving in, review this guide on diagnostic tools to ensure you’re well-equipped. I once skipped this step and wasted hours guessing which part was faulty, leading to unnecessary replacements and risking my warranty. Proper tools streamline your process and prevent costly mistakes.
Follow a Systematic Diagnostic Approach
Start with Visual Inspection
First, open your dishwasher and look for obvious issues like leaks, loose wires, or debris blocking sensors. I remember once I found a small piece of plastic caught in the spray arm, which was causing a cycle halt. Clearing such obstructions often solves simple problems and avoids unnecessary repairs. Use a bright flashlight to see into tight spots and ensure everything looks normal. If you spot damaged wiring or corrosion, document it for future reference.
Check Basic Functionality
Next, test the simplest components — door latches, water inlet valves, and filters. For example, I tested the door latch with a multimeter and discovered it wasn’t locking properly, which explained why my dishwasher wouldn’t start. Ensure water supply is steady, and filters aren’t clogged, as these are common issues that can be fixed without professional help. Refer to this troubleshooting guide for detailed steps.
Test Electrical and Electronic Components
Use your multimeter to check switches, sensors, and circuit boards. For instance, I tested the float switch and found it was stuck, preventing the dishwasher from filling. If you’re unsure how to test a component, consult this resource. Be cautious—disconnect power before testing to avoid shocks. Document any readings that deviate from manufacturer specifications. This precision helps when you submit a warranty claim or seek professional repair.
Leverage Diagnostic Codes and Error Messages
Modern dishwashers display error codes that pinpoint issues. If your model shows a code, look up its meaning in the manual or online. When my dishwasher displayed an error code for a heating issue, I referenced this guide to interpret and verify the problem. Reset the dishwasher after fixing the issue to see if the code clears. Properly diagnosing based on codes prevents unnecessary part replacements and safeguards your warranty.
Document Your Findings
Keep a detailed log of your diagnostic steps, test results, and parts checked. This record is invaluable if you need to claim warranty or consult a technician later. I once showed my notes to a repair tech, which expedited the process and ensured I didn’t void my warranty by misdiagnosis. Use photos and written notes to create a comprehensive troubleshooting report.
Know When to Call Professionals
If diagnostics point to complex electronics, or if you’re unsure of your findings, it’s wise to contact a qualified technician. Proper diagnostics can help you avoid costly errors, but some issues require expert tools and expertise. Remember, the goal is to repair confidently without risking your warranty. For expert tips on how to decide, check this resource. Sometimes, a professional diagnosis is the best investment to protect your appliance’s warranty and ensure a reliable fix.
Many homeowners believe they understand how to diagnose dishwasher issues, but some persistent myths can lead you astray—potentially risking your warranty and causing more damage. Let’s dig deeper into these misconceptions and uncover the hidden nuances that even seasoned DIYers often overlook.
Why Everyone Gets Diagnosis Wrong—And How to Avoid It
One of the biggest myths is that replacing the most obvious faulty part always fixes the problem. This approach seems straightforward: if your dishwasher isn’t draining, replace the drain pump. However, this can be a costly mistake if the root cause is actually a clogged filter or a faulty sensor further upstream. Rushing into part replacements without thorough diagnostics can void your warranty if the repair isn’t properly justified.
Another common misconception is that error codes are always accurate. While modern dishwashers do display diagnostic codes, these are not foolproof. Sometimes, a code may point to a symptom rather than the cause—like a warning light that indicates a sensor failure but in reality, the problem is a blocked spray arm. Relying solely on codes without corroborating your findings through proper testing can lead to misdiagnosis.
Beware the ‘Quick Fix’ Trap
Many homeowners fall into the trap of attempting quick fixes based on surface-level symptoms. For example, resetting the machine might temporarily clear an error, but if the underlying issue—say, a faulty heating element—is not addressed, the problem will recur. This not only wastes time but can also complicate diagnostics, making it harder for professionals to identify the real issue later.
Advanced diagnostics require a systematic approach—testing electrical components with a multimeter, inspecting sensors for cleanliness and proper operation, and verifying water supply and drainage paths. Skipping these steps can lead to unnecessary replacements and, ultimately, warranty denial if the repair isn’t properly documented.
What About the Myths Around Diagnostic Tools?
A widespread myth is that professional diagnostic tools are only necessary for technicians. The truth is, investing in quality diagnostic tools can significantly improve your ability to troubleshoot accurately. For example, using a multimeter correctly can help you verify if a sensor is functioning as it should, preventing unnecessary part swaps. Learn more about the right diagnostic tools here.
However, beware of relying on cheap or generic tools. Inaccurate readings can lead to misdiagnosis, which might be seen as negligent by warranty inspectors. Mastering the proper use of diagnostic equipment is an advanced skill that separates the casual DIYer from the appliance repair expert.
How Can You Protect Your Warranty While Troubleshooting?
To maximize your chances of a successful, warranty-approved repair, always document your diagnostic process. Take photos, record test results, and keep detailed notes. When consulting a professional later, these records can help justify that your initial diagnosis was thorough and correct, reducing the risk of warranty denial.
Remember, the goal is not just to fix the problem but to do so in a way that aligns with warranty guidelines. Using proper diagnostic procedures, understanding the limitations of error codes, and investing in quality tools will set you apart from the average homeowner. Have you ever fallen into this trap? Let me know in the comments.
Keeping your dishwasher in top shape requires more than just occasional cleaning; it involves using the right diagnostic tools and implementing a consistent maintenance routine. As an experienced DIY enthusiast, I rely on specific equipment that ensures accurate diagnostics and long-term reliability. One of my go-to tools is a high-quality digital multimeter, such as the Fluke 117, which I use to verify electrical components like heating elements, switches, and sensors. Its precision helps me avoid unnecessary replacements and ensures that my repairs meet warranty standards.
In addition to a multimeter, I recommend investing in an appliance-specific diagnostic tester. These devices, like the Amprobe ATP-200, allow me to quickly identify faulty sensors and circuit boards without invasive disassembly. I personally find that having a reliable tester reduces guesswork and accelerates troubleshooting, especially when dealing with complex electronic controls. For detailed guidance on diagnostic tools, check this resource.
Regular maintenance extends the lifespan of your dishwasher and minimizes the risk of unexpected breakdowns. I schedule monthly inspections, including cleaning the spray arms, filters, and drainage systems. Using a soft brush and vinegar solution helps prevent buildup and clogs. I also keep an eye on door seals and wiring connections, tightening loose screws and applying dielectric grease where needed. These proactive steps are crucial for preserving warranty coverage, especially when combined with proper diagnostics.
How do I maintain my dishwasher over time?
Consistent diagnostics are key. I recommend periodically running self-tests using your diagnostic tools to verify sensor functionality and circuit integrity. Monitoring error codes and water levels regularly can help catch issues early. Additionally, updating your knowledge with expert tips from this guide ensures you stay ahead of potential problems. In my experience, maintaining a routine and using precise tools not only saves money but also guarantees your appliance remains warranty-compliant and dependable for years. For example, I recently used my multimeter to verify the resistance of my dishwasher’s heating element before replacing it, ensuring I didn’t void my warranty with an unnecessary part swap. I encourage you to try this diagnostic step and see how it can save you time and hassle.
Lessons From My Troubleshooting Journey
One of the toughest lessons I learned was the importance of patience and thoroughness. Rushing to replace parts based on error codes alone often led me down costly paths and even risked voiding my warranty. Now, I take the time to systematically diagnose before acting, which consistently saves money and preserves my coverage.
I also realized that investing in the right diagnostic tools, like a quality multimeter and specialized testers, makes a huge difference. Cheap tools can mislead you, causing unnecessary repairs that might not be warranty-approved. My lightbulb moment was understanding that precise testing is key to confident troubleshooting.
Finally, keeping detailed notes and photos during diagnostics has been invaluable. When I later showed these to professional technicians, it sped up repairs and confirmed I had correctly identified the problem. This proactive approach ensures I stay within warranty guidelines and repair efficiently.
Tools and Resources That Changed My Approach
For anyone serious about DIY dishwasher repairs, I recommend starting with a reliable digital multimeter like the Fluke 117. It’s precise and durable, helping me verify electrical components without guesswork. I also trust an appliance-specific diagnostic tester, such as the Amprobe ATP-200, which quickly pinpoints sensor issues and circuit faults, saving me hours of disassembly.
To deepen my knowledge, I turn to trusted guides like this resource on diagnostic tools and tips for quick troubleshooting. These sources have helped me refine my skills and ensure my repairs are warranty-compliant.
Additionally, reading expert articles on diagnostic strategies for warranty success has broadened my understanding. Combining practical tools with solid knowledge makes all the difference in successful, warranty-safe repairs.
Your Path to Confident Dishwasher Repairs
Now, it’s your turn. Embrace the diagnostic process with patience, the right tools, and detailed documentation. These steps not only help you fix problems effectively but also protect your warranty and your wallet. Don’t hesitate—start mastering your dishwasher diagnostics today and turn frustration into confidence.
What’s been your biggest challenge when diagnosing appliance issues? Share your experience below and let’s learn together!
Leave a Reply